Hello again, Crafty Friends. You'd be forgiven for thinking that nothing was going on craft wise for me based on this blog, but you'd be wrong! I've actually been doing quite a bit, but can't share the cards I've made until I know they've gone to their intended recipients. I like things to be a surprise!
Instead I've been making the most of some of the freebies I receive as part of my subscription to Simply Cards and Papercraft. This month it was a build-a-flower die, but I've not had any inspiration to use it yet, despite all the cards inside. They highlighted, however, that Papercraft Essentials (it's sister magazine), issue 124 had a great looking Christmas die and stamp set. I swithered about it, but I knew I wanted it, and when I saw that Liz McGuire of Buttons For Brains was doing the inspiration cards, I had to get it. So I did. And it's great.
I felt like pairing it up with my other great favourite, the Mini Milk Cartons from SCP issue 136. I think it works a treat.
I actually made two of them, the second being more successful than the first, so I'll tell you how I did the second! I cut my Bazzill Bling cardstock to size and scored it on the board, as per the instructions in the magazine.
I then die cut out my Merry Christmas and holly onto green cardstock, putting some Stick It on the back. I decided second time round it was easier to put the die cuts onto the carton before making it up, as I do with the sticky tape.
I then carefully stuck the cartons together. I say carefully because that tape is lethal if you get it wrong and tears the card badly if you have to remove it - it usually ruins it. But if you get it right, it sticks like super glue!
You can get two cartons out of one 12x12 piece of cardstock, but as you can see, on the second, the bottom piece is shorter. It didn't seem to matter too much, and I think the second actually looks neater.
I then stamped the robin onto some Neenah 110lb cardstock (it arrived this week from Simon Says Stamp!) in Memento Tuxedo Black and coloured him with Copics, and carefully cut a circle out around him - I drew around a circle die cut as a template to make things easier.
I attached him to the top with twine, and added a mini peg for good measure. As I've mentioned before, you can get 4 Lindor in each one - they make a nice little gift.
Here are a few more arty shots - I'm getting used to my new camera. And just in case you are wondering why the holly berries are green, I'd like to say it was artistic licence, but sadly, it's just that I discovered that I don't have any red card stock at the moment - I shall rectify that soon!
[Supplies: Free die and stamp set from Papercraft Essentials issue 124; Scoreboard from SCP 136; Bazzill 12x12 cardstock; Super Sticky Red tape; Scissors; Manual Die Cutting Machine - mine is a Grand Calibur; Papermania Capsule 6x6 Solid Smooth Texture 75 sheets and coloured cardstock; Stick It; Neenah Solar White 110lb cardstock; Memento Tuxedo Black; Red Baker's Twine (free with a magazine!); Copic Markers; Mini pegs - I actually got mine in Sainsburys, but they aren't listed online]
Thank you so much for reading. I really do cherish all your comments. Have a great weekend :)
P.S. Don't forget that there's a new Clearly Besotted release this Saturday (5th September, 10pm GMT). I know what I'm getting ;)
Showing posts with label Bazzill. Show all posts
Friday, 4 September 2015
Friday, 3 July 2015
It's a boy!
Hello, crafty friends. I don't know about you, but I can't believe it's July already. June was quite a crafty month with the Daily Marker 30 Day 2. I'm sad it's over, because I had so much fun learning new things, but all good things must come to an end, and it's time I started turning all that colouring into cards!
Over on Instagram (it's lovely, really lovely, so much inspiration and friendly crafters!) I shared some colouring linked to a baby a friend was expecting. I hedged my bets and did two lots, one in pink and one in blue. I'm not usually quite so generic, but sometimes inspiration is lacking! Anyway, it turned out to be a boy, by the name of George, so blue it is!
I stuck with simple and decided to make a shaker too - any chance to get those Lucy Abram's shaker mixes out!
Supplies: White Card Blank (14.75x14.75cm); ME Up And Away Stamps and Dies; Papermania 6x6 Papers Capsule Collection; Memento Tuxedo Black; VersaMagic Dew Drop Night Sky; Derwent Artists Pencils; Caran D'Ache Metallic Pencils; LF Large Stitched Square Lawn Cuts; Acetate; Double-sided Tape; Red tape; Adhesive backed Fun Foam; CB Sweet Little Sentiments; Lucy's Little Things Shaker Sequin selection Glacier; Joe and Flo Baker's Twine; Sellotape Double Sided Sticky Foam Pads; Ranger Multi Medium Matte; Bazzill Cardshoppe - blue; VersaMagic Dew Drop Aspen Mist
I started by die cutting a square of blue Bazzill Cardshoppe using two of the LF large stitched square lawn cuts to make a frame. I then attached a piece of acetate to the back of the square aperture to start the shaker section. I then hand cut a piece of adhesive backed fun foam to match the size of the frame, and stuck it down on the back of my blue card. Face down on my craft mat I then filled the shaker section with lots of Lucy's lovely sequins and things.
I then attached some very sticky red tape to the back of the fun foam, positioned it face down on my craft mat and attached the card base on the top. I'm getting better at this the more I do and this one is not too squint!
I then attached some baker's twine to the back of the balloons and then to the monkey's hand. Then, with double sided sticky foam pads, attached them to the card front as shown.
The sentiment is stamped in Aspen Mist and attached with sticky foam pads. The additional sequins started by covering a slight smudge, but I added a few more so it wasn't quite so obvious! They are stuck on with the Multe Medium Matte.
Hope you survived the mid week heat wave - that'll be summer over now in the UK, we've already had torrential rain today!
Do enjoy your weekend, whatever the weather. Thanks, as always, for reading :)
Over on Instagram (it's lovely, really lovely, so much inspiration and friendly crafters!) I shared some colouring linked to a baby a friend was expecting. I hedged my bets and did two lots, one in pink and one in blue. I'm not usually quite so generic, but sometimes inspiration is lacking! Anyway, it turned out to be a boy, by the name of George, so blue it is!
I stuck with simple and decided to make a shaker too - any chance to get those Lucy Abram's shaker mixes out!
Supplies: White Card Blank (14.75x14.75cm); ME Up And Away Stamps and Dies; Papermania 6x6 Papers Capsule Collection; Memento Tuxedo Black; VersaMagic Dew Drop Night Sky; Derwent Artists Pencils; Caran D'Ache Metallic Pencils; LF Large Stitched Square Lawn Cuts; Acetate; Double-sided Tape; Red tape; Adhesive backed Fun Foam; CB Sweet Little Sentiments; Lucy's Little Things Shaker Sequin selection Glacier; Joe and Flo Baker's Twine; Sellotape Double Sided Sticky Foam Pads; Ranger Multi Medium Matte; Bazzill Cardshoppe - blue; VersaMagic Dew Drop Aspen Mist
I started by die cutting a square of blue Bazzill Cardshoppe using two of the LF large stitched square lawn cuts to make a frame. I then attached a piece of acetate to the back of the square aperture to start the shaker section. I then hand cut a piece of adhesive backed fun foam to match the size of the frame, and stuck it down on the back of my blue card. Face down on my craft mat I then filled the shaker section with lots of Lucy's lovely sequins and things.
I then attached some very sticky red tape to the back of the fun foam, positioned it face down on my craft mat and attached the card base on the top. I'm getting better at this the more I do and this one is not too squint!
I then attached some baker's twine to the back of the balloons and then to the monkey's hand. Then, with double sided sticky foam pads, attached them to the card front as shown.
The sentiment is stamped in Aspen Mist and attached with sticky foam pads. The additional sequins started by covering a slight smudge, but I added a few more so it wasn't quite so obvious! They are stuck on with the Multe Medium Matte.
Hope you survived the mid week heat wave - that'll be summer over now in the UK, we've already had torrential rain today!
Do enjoy your weekend, whatever the weather. Thanks, as always, for reading :)
Friday, 26 June 2015
Flowers for sisters
Hello again! I've been busy making cards not just for the various birthdays this month, but also for the commission of 10 cards that my mother in law asked me for. I've been enjoying the challenge - and the opportunity to buy new stamps and other goodies for it! One of these cards is for my sister, the other for hers (I'll let her choose which she prefers!) and thanks to The Daily Marker 30 Day Colouring Challenge, I've been trying out new techniques. This one is water colouring with an embossed image using a gorgeous flower stamp set from Clearly Besotted - Just Darling.
[Supplies: Spectrum Aqua Markers - Floral; Versa Mark Ink; WOW! Bright White Embossing Powder; Ranger Dye Ink Grape Soda; Ranger Archival Ink Jet Black; Wink of Stella 8mm Tip Pen; Bazzill Basics Paper; Clearly Besotted Just Darling]
I absolutely loved doing these cards. It made me feel like I was a real artist - even though I am most definitely not! I also definitely need more flower stamps in my life...
I stamped the images onto water colour paper with Versa Mark ink and heat embossed with WOW! Bright white embossing powder. I then simply used my Spectrum Aqua markers directly onto the paper and blended with water. The embossed image saves colour running too much onto the blank space.
This is mounted using fun foam and lots of tape onto a card blank with has two 2cm strips of Bazzill basics paper at either side - it's a cheat and saves me paper! The sentiment is from the set stamped in Ranger Dye Grape Soda. I wrote over the sentiment in Wink of Stella and also added a little to the flowers - a card is not a card without Wink of Stella!
This card is simply mounted onto a Kraft card blank with fun foam and the sentiment stamped in Ranger Archival Jet Black. I held back on the Wink of Stella!
Thank you so much for reading, hope you have a great weekend - can you believe we're nearly in July??
[Supplies: Spectrum Aqua Markers - Floral; Versa Mark Ink; WOW! Bright White Embossing Powder; Ranger Dye Ink Grape Soda; Ranger Archival Ink Jet Black; Wink of Stella 8mm Tip Pen; Bazzill Basics Paper; Clearly Besotted Just Darling]
I absolutely loved doing these cards. It made me feel like I was a real artist - even though I am most definitely not! I also definitely need more flower stamps in my life...
I stamped the images onto water colour paper with Versa Mark ink and heat embossed with WOW! Bright white embossing powder. I then simply used my Spectrum Aqua markers directly onto the paper and blended with water. The embossed image saves colour running too much onto the blank space.
This is mounted using fun foam and lots of tape onto a card blank with has two 2cm strips of Bazzill basics paper at either side - it's a cheat and saves me paper! The sentiment is from the set stamped in Ranger Dye Grape Soda. I wrote over the sentiment in Wink of Stella and also added a little to the flowers - a card is not a card without Wink of Stella!
This card is simply mounted onto a Kraft card blank with fun foam and the sentiment stamped in Ranger Archival Jet Black. I held back on the Wink of Stella!
Thank you so much for reading, hope you have a great weekend - can you believe we're nearly in July??
Friday, 15 May 2015
Thank You and Notelets - playing with Spectrum Aquas
Hello everyone! Hope you've had a good week and are looking forward to the weekend. I've three cards to share with you that I made using my new Spectrum Aqua markers - my subscription present from Simply Cards and Papercraft.
The first is a Thank You card for my in laws - they bought some beautiful clothes for the little ones and helped keep them occupied when they visited last week, which deserves a card at the very least!
I used three shades of Spectrum Aquas floral set for the outer panel (Blossom, Begonia and Rose Pink), rubbing the pen onto an acrylic block, then adding water and painting it onto my water colour panel. After letting it dry, I splashed water onto it with a brush and dabbed it with some kitchen towel leaving splatters. I love this technique! I then got a bit bokeh and used a star stencil (I got this free with my first ever purchase of Simply Cards and Papercraft!) with some Ranger Glacier White pigment ink and got busy dabbing it all over the panel. I then left it to dry whilst painting up the inner panel with three of the Spectrum Aquas essentials set (Spice, Tan and Peach), leaving it to dry and then splatter painting it too.
Once they were both dry, I made a frame of the outer panel using two of my Lawn Fawn large stitched squares, and a panel of the inner one to fit into the frame. I adhered the inner panel to the middle of a square card blank and then the frame using a lot of foam tape. The sentiment I stamped onto some pink card and heat embossed it with my Wow! bright white embossing powder before cutting out the flag. I added some stick on pearls for a bit of bling.
To the notelets!
The pink notelet was made from the inner panel of the above with another Thank You flag, adhering it with fun foam - two cards for the price of one! I made a 4x4 card blank for that one.
The other notelet was a different technique. Basically I got some water colour card and drew some very basic flowers on it using Marigold, Sunflower and Leaf Green before brushing over it with water and smudging it. I think it looks like old wall paper and I love it. I then cut out four little squares and adhered them with fun foam to another 4x4 card blank. I also made a couple of little envelopes for these with my WRMK Envelope Punch board and some Bazzill basics - they look so sweet!
I love the markers for making backgrounds. They blend well. I'll continue to practice and try different techniques - there are loads of great videos on YouTube.
Thank you for getting this far. Have a great weekend!
The first is a Thank You card for my in laws - they bought some beautiful clothes for the little ones and helped keep them occupied when they visited last week, which deserves a card at the very least!
I used three shades of Spectrum Aquas floral set for the outer panel (Blossom, Begonia and Rose Pink), rubbing the pen onto an acrylic block, then adding water and painting it onto my water colour panel. After letting it dry, I splashed water onto it with a brush and dabbed it with some kitchen towel leaving splatters. I love this technique! I then got a bit bokeh and used a star stencil (I got this free with my first ever purchase of Simply Cards and Papercraft!) with some Ranger Glacier White pigment ink and got busy dabbing it all over the panel. I then left it to dry whilst painting up the inner panel with three of the Spectrum Aquas essentials set (Spice, Tan and Peach), leaving it to dry and then splatter painting it too.
Once they were both dry, I made a frame of the outer panel using two of my Lawn Fawn large stitched squares, and a panel of the inner one to fit into the frame. I adhered the inner panel to the middle of a square card blank and then the frame using a lot of foam tape. The sentiment I stamped onto some pink card and heat embossed it with my Wow! bright white embossing powder before cutting out the flag. I added some stick on pearls for a bit of bling.
To the notelets!
The pink notelet was made from the inner panel of the above with another Thank You flag, adhering it with fun foam - two cards for the price of one! I made a 4x4 card blank for that one.
The other notelet was a different technique. Basically I got some water colour card and drew some very basic flowers on it using Marigold, Sunflower and Leaf Green before brushing over it with water and smudging it. I think it looks like old wall paper and I love it. I then cut out four little squares and adhered them with fun foam to another 4x4 card blank. I also made a couple of little envelopes for these with my WRMK Envelope Punch board and some Bazzill basics - they look so sweet!
I love the markers for making backgrounds. They blend well. I'll continue to practice and try different techniques - there are loads of great videos on YouTube.
Thank you for getting this far. Have a great weekend!
Sunday, 26 April 2015
Mini Milk Cartons
Hello again! I had to share these fantabulous mini milk cartons that I made using the free Gorgeous Gifts score board I got with Simply Cards and Papercraft issue 136. I've used everything I've ever got with this magazine, and having realised I've bought 5 of the last 6, I've just taken out a subscription for a year - more inspiration, more people's blogs to follow and more freebies, plus some Spectrum Aquas for subscribing. Not bad!
They're made from Bazzill Basics, with some baker's twine and stuck together with red tape - so they stick really well together.
I had thought that they would be great with a little miniature whisky or gin bottle, but I couldn't find one to fit (they are quite small), so a second best option was Lindor. The little boxes are just perfect and four Lindor fit in nicely. I added the labels with 'Drink Me!' on them because they're milk cartons. Even though they're filled with chocolate, I thought 'Eat me!' would just look odd!
So much fun. Must try some of the other projects and see what other goodies I can think about buying - this is addictive!!
They're made from Bazzill Basics, with some baker's twine and stuck together with red tape - so they stick really well together.
I had thought that they would be great with a little miniature whisky or gin bottle, but I couldn't find one to fit (they are quite small), so a second best option was Lindor. The little boxes are just perfect and four Lindor fit in nicely. I added the labels with 'Drink Me!' on them because they're milk cartons. Even though they're filled with chocolate, I thought 'Eat me!' would just look odd!
So much fun. Must try some of the other projects and see what other goodies I can think about buying - this is addictive!!
Friday, 24 April 2015
Musical notes
Morning! It's another lovely day here in W Yorkshire, baby is asleep and I've the cards I made yesterday to share. I have two occasions to make cards for. One is for our singing group leader who set up the group a year ago, and has done loads of work with us, and the second a birthday card for my future brother in law. Both were made pretty much in the same way and after some inspiration from Nichol Magouirk (the frame) and Pops (white on white).
Here they are:
After watching Nichol's video, I took my stitched edge rectangle dies and cut the frame using two of the dies from white Bazzill textured card stock. I then cut the inside panel from white card and stamped the musical notes (they are Twinchies from Inkylicious, but I can't find them on their website - I got them at a show) in various colours with Memento and Ranger Dye Inks, adding a little glossy accents to them. I then put some musical washi tape around the outside of the card base, added foam tape to the frame and stuck it on, adding the middle with double sided. I reckon it would have been easier the other way around, but I only thought of that later!
The words are both Clearly Besotted, happy birthday and thanks. I die cut them with double sided tape attached, a great tip for making it easier to stick down once you've cut them. I added a little green gem to the dot for the 'i', because I always lose it when I peel it out, it is so tiny!
Thank you for reading, hope you have a great weekend :)
Here they are:
After watching Nichol's video, I took my stitched edge rectangle dies and cut the frame using two of the dies from white Bazzill textured card stock. I then cut the inside panel from white card and stamped the musical notes (they are Twinchies from Inkylicious, but I can't find them on their website - I got them at a show) in various colours with Memento and Ranger Dye Inks, adding a little glossy accents to them. I then put some musical washi tape around the outside of the card base, added foam tape to the frame and stuck it on, adding the middle with double sided. I reckon it would have been easier the other way around, but I only thought of that later!
The words are both Clearly Besotted, happy birthday and thanks. I die cut them with double sided tape attached, a great tip for making it easier to stick down once you've cut them. I added a little green gem to the dot for the 'i', because I always lose it when I peel it out, it is so tiny!
Thank you for reading, hope you have a great weekend :)
Wednesday, 8 April 2015
I like big books...
I bought a few nice things in the March release from Clearly Besotted Stamps. I do so love their style! The Bookworm Additions I had to have because I'm a librarian by profession and have lots of librarian and also book loving friends who will appreciate this... if only for the pun on the flag!
I have some Kraft card I bought a few weeks ago as I kept seeing it mentioned in various magazines and blogs. I'm not entirely sure I like it, but I'm willing to give it a go. I also hadn't used any lovely Bazzill for a while, so I grabbed some of my browns as I thought it would go with the Kraft. Who knew I'd like brown so much?
I started by stamping one of the books from the Bookworms set using my old favourite, Memento Tuxedo Black and colouring it in with my Derwent pencils with a bit of metallic from my new Caran D'Ache set. I stamped the two bookworms (one from the main set, the other from additions), plus the flag with my Versa Magic Dew Drops - Hint of Pesto, Aloe Vera, Perfect Plumeria - and then die cut them out.
I took some Bazzill card stock and cut to size to layer on the Kraft. I then die cut a circle using my Nestabilities Circles, from the top piece. It is just wide enough to show the bookcase behind it. I glued the bookcase to the back card, then stuck the bookworms to the back of the top piece of card, so they'd be in front of the books (they are a bit cheeky those bookworms!). I then attached the top piece with foam tape to add a bit of dimension. The banner I also adhered with foam pads.
It makes me laugh and I hope it does you too! Thanks for reading :)
Tuesday, 17 March 2015
Birthday Express
Been a week since I blogged and I've been getting a bit frustrated at the lack of crafting going on in my life. We all got colds and under 5s with colds are hard work, bless them. Not been well. However, we're all back on the mend just in time for our holiday in a few days and as we're going to visit some friends with a little one who just turned 4, I figured some crafting was in order. Here is the end result!
The base is a precut A6 card blank. I used my Derwent Inktense Pencils (Hot Red, Sun Yellow, Lagoon) to create the backing colours on a piece of water colour paper, blending them slightly together - I will be getting some more pencils in next month's crafting purchase! I then cut it to size and rounded the corners.
The die is the Sweet Dixie steam train and I bought it because my husband is a railway enthusiast. For those who want to know, it is a 9F, of which, nine still survive. I cut it out of some scrap silver card and glued it to the water colour paper. I then stuck it onto the card top, and stuck this onto the card blank with double sided tape.
I stamped the name and the age using Memento Tuxedo Black onto some Bazzill card and coloured them in with my pencils, then cut them out and stuck them onto the card with foam pads. I thought it would be fun to have them take the place of the steam!
I hope you and he like it. Thanks for reading :)
The base is a precut A6 card blank. I used my Derwent Inktense Pencils (Hot Red, Sun Yellow, Lagoon) to create the backing colours on a piece of water colour paper, blending them slightly together - I will be getting some more pencils in next month's crafting purchase! I then cut it to size and rounded the corners.
The die is the Sweet Dixie steam train and I bought it because my husband is a railway enthusiast. For those who want to know, it is a 9F, of which, nine still survive. I cut it out of some scrap silver card and glued it to the water colour paper. I then stuck it onto the card top, and stuck this onto the card blank with double sided tape.
I stamped the name and the age using Memento Tuxedo Black onto some Bazzill card and coloured them in with my pencils, then cut them out and stuck them onto the card with foam pads. I thought it would be fun to have them take the place of the steam!
I hope you and he like it. Thanks for reading :)
Friday, 6 March 2015
Dragonflies
Hello! Yesterday morning while the baby napped I crafted like a demon. It's lucky I did because we had no power all evening from 4-9pm - not great with tiny ones. Thank heaven for my old whistling kettle and a gas hob!
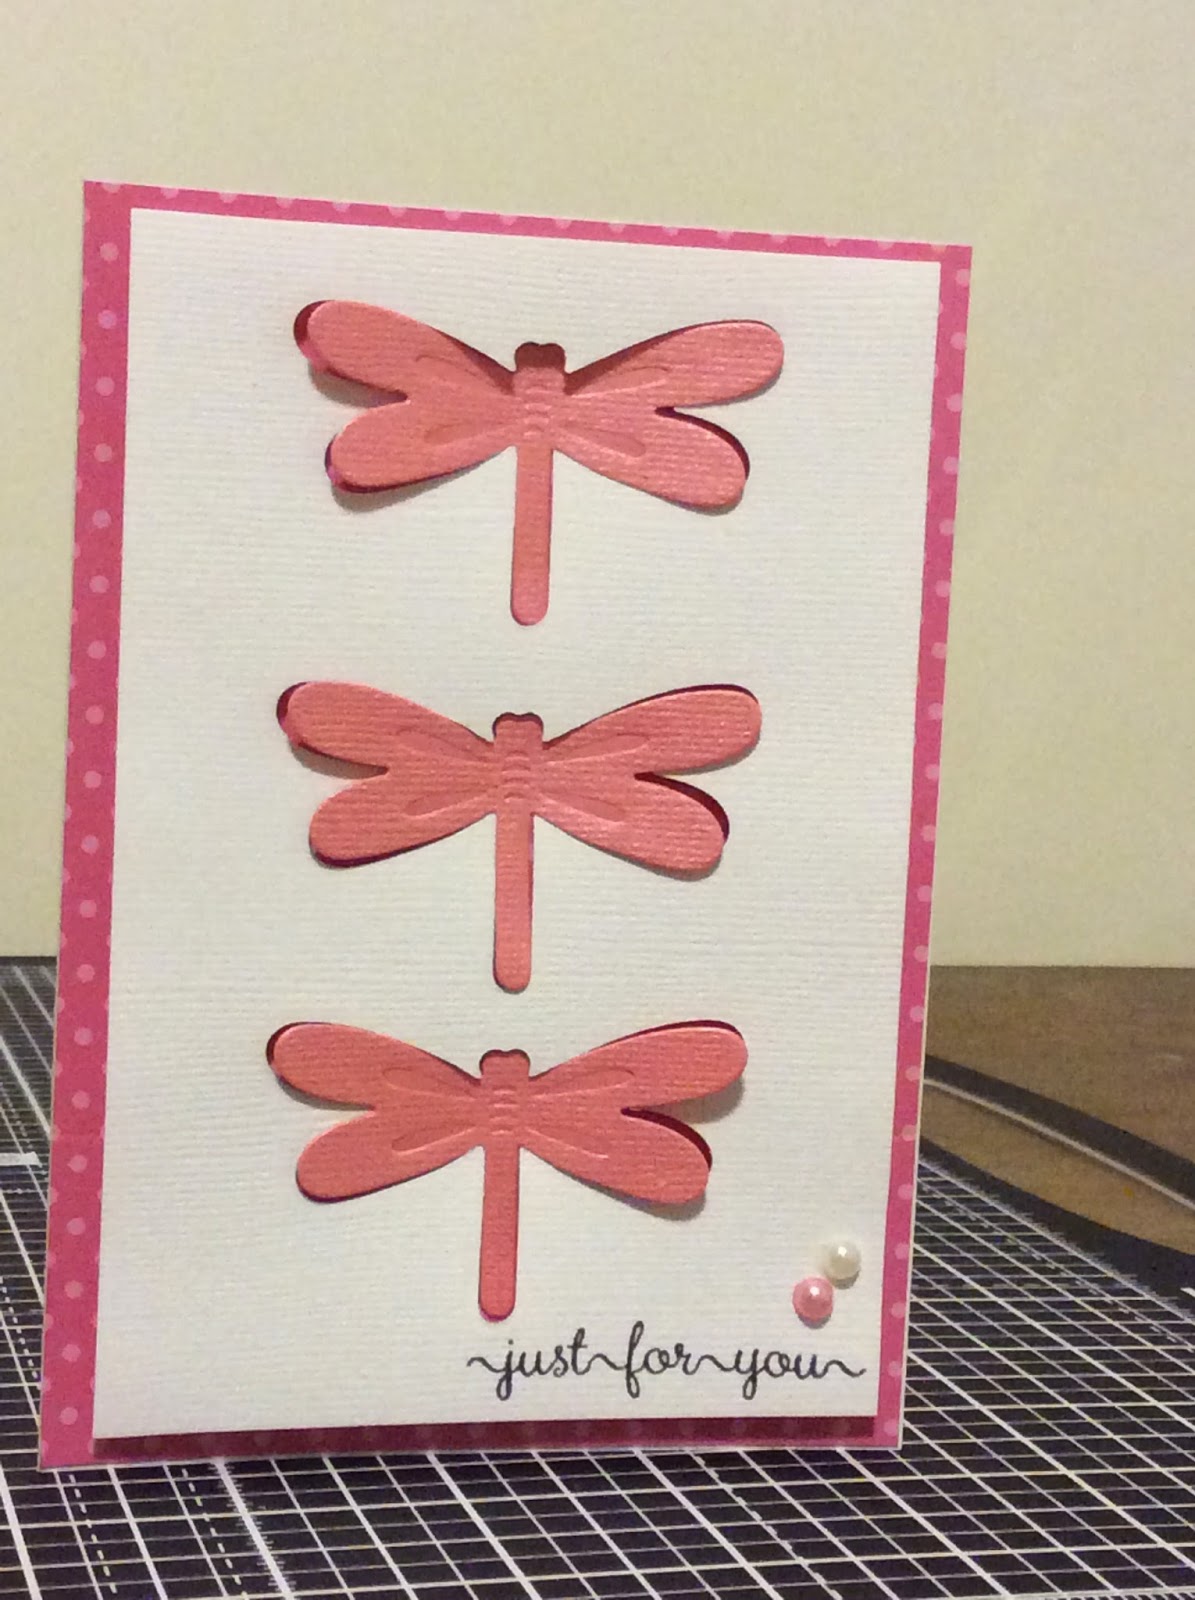
So, here are two of the three (yes! 3!) cards I made. It's using the free dragonfly die and stamp set that came with issue 134 of Simply Cards and Papercraft. I like to try out some of the cards when I get an issue using similar products that I have in my stash. I get to try new techniques without buying even more stuff, especially as I was waiting for the new Clearly Besotted Stamps March release. I've also decided, that if I have time and inclination, I'll make multiples of cards. Means I can dip into my cards when I need one in an emergency.
They're both made in the same way using an A6 pre-scored card blank. I covered them with spotty paper from a pack of Pebbles Card Making Basics. This isn't ideal, as it has a score line so you can make them into cards, but it is not too noticeable when as a card back.
I then die cut three dragonflies from a sheet of Bazzill paper - white and pink (Bazzill Bling). I added the sentiment from the Clearly Besotted sweet little sentiments stamp using Memento Tuxedo Black ink and added a couple of sticky pearls.
I adhered the card top to the card using foam pads on the top card, but on the bottom one, I just used glue, to see which I'd prefer (glue!). I then put some glue on the body of the butterflies and stuck them into the apertures, bending the wings slightly so they were proud of the card.
Thank you for reading and I hope you like :)
So, here are two of the three (yes! 3!) cards I made. It's using the free dragonfly die and stamp set that came with issue 134 of Simply Cards and Papercraft. I like to try out some of the cards when I get an issue using similar products that I have in my stash. I get to try new techniques without buying even more stuff, especially as I was waiting for the new Clearly Besotted Stamps March release. I've also decided, that if I have time and inclination, I'll make multiples of cards. Means I can dip into my cards when I need one in an emergency.
They're both made in the same way using an A6 pre-scored card blank. I covered them with spotty paper from a pack of Pebbles Card Making Basics. This isn't ideal, as it has a score line so you can make them into cards, but it is not too noticeable when as a card back.
I then die cut three dragonflies from a sheet of Bazzill paper - white and pink (Bazzill Bling). I added the sentiment from the Clearly Besotted sweet little sentiments stamp using Memento Tuxedo Black ink and added a couple of sticky pearls.
I adhered the card top to the card using foam pads on the top card, but on the bottom one, I just used glue, to see which I'd prefer (glue!). I then put some glue on the body of the butterflies and stuck them into the apertures, bending the wings slightly so they were proud of the card.
Thank you for reading and I hope you like :)
Monday, 2 March 2015
Birds on a Wire - From me to you
I started a card on Friday whilst baby was napping and toddler was at nursery. She's been a bit poorly this week, so it didn't last long and I only managed to finish it this morning whilst she was napping and toddler was watching CBeebies. Didn't take long, just needed a bit of glue and a sentiment.
I decided to try my hand at one of the cards I saw in Simply Cards and Papercraft, with the idea of having something interesting on the inside of the card, in my case, viewed from an aperture.
I started with a 6x6" card blank in Bazzill Cardshoppe in a nice blue shade. I found another shade of blue Bazzill Basics in my stash and cut it 1/4" smaller than the card front and added another layer in cream Bazzill Basics 1/4" smaller still on top - that's a bit long winded for mat and layering! I cut a circle aperture on the bottom right of the card top using my Spellbinders Nestabilities Circles dies. Next I took the card front and cut a circle in the larger size. I then took some watercolour paper and using my Derwent Inktense pencils, made some blocks of colour which I brushed with water and used to die cut out the Spellbinders 'Birds on a wire' (a Christmas present that I've finally found a project for!). I stamped the sentiment (Clearly Besotted Mini Basic Banners) onto the inside of the card using Memento Tuxedo Black and affixed the birds to the card top, then the card top to the card front and there you are!
I love the blues and I feel it needs an envelope - time to crack out the envelope board :)
I decided to try my hand at one of the cards I saw in Simply Cards and Papercraft, with the idea of having something interesting on the inside of the card, in my case, viewed from an aperture.
I started with a 6x6" card blank in Bazzill Cardshoppe in a nice blue shade. I found another shade of blue Bazzill Basics in my stash and cut it 1/4" smaller than the card front and added another layer in cream Bazzill Basics 1/4" smaller still on top - that's a bit long winded for mat and layering! I cut a circle aperture on the bottom right of the card top using my Spellbinders Nestabilities Circles dies. Next I took the card front and cut a circle in the larger size. I then took some watercolour paper and using my Derwent Inktense pencils, made some blocks of colour which I brushed with water and used to die cut out the Spellbinders 'Birds on a wire' (a Christmas present that I've finally found a project for!). I stamped the sentiment (Clearly Besotted Mini Basic Banners) onto the inside of the card using Memento Tuxedo Black and affixed the birds to the card top, then the card top to the card front and there you are!
I love the blues and I feel it needs an envelope - time to crack out the envelope board :)
Thursday, 26 February 2015
Engaged
This was the card I tried to make as a shaker card with little punched hearts and butterflies as the shaker elements. It was a disaster. I decided to rethink things altogether and not having done any embossing for ages, I got my powders and heat gun ready and made a very simple, but sparkly, card for a friend who recently got engaged.
The card blank is Bazzill Cardshoppe, cut down to 6"x6". I took another piece of Bazzill card, and trimmed it to size and used the reverse punch on my We R Memory Keepers Envelope Punch Board to make rounded corners. I then stamped the three elements (rose from free Clearly Besotted stamp set, rings from Hobbycraft, sentiment from Clearly Besotted mini basic banners) using pigment inks and embossed them with Papermania embossing powders in Tinsel Red, Enchanted Gold and Silver. I simply then adhered this to the card front with some double sided tape. Job done.
I've become very attached to my We R Memory Keepers Envelope Punch Board and having received a job lot of Bazzill Basics paper from an unexpected win on eBay, I decided to make an envelope to go with it in pink.
The card blank is Bazzill Cardshoppe, cut down to 6"x6". I took another piece of Bazzill card, and trimmed it to size and used the reverse punch on my We R Memory Keepers Envelope Punch Board to make rounded corners. I then stamped the three elements (rose from free Clearly Besotted stamp set, rings from Hobbycraft, sentiment from Clearly Besotted mini basic banners) using pigment inks and embossed them with Papermania embossing powders in Tinsel Red, Enchanted Gold and Silver. I simply then adhered this to the card front with some double sided tape. Job done.
I've become very attached to my We R Memory Keepers Envelope Punch Board and having received a job lot of Bazzill Basics paper from an unexpected win on eBay, I decided to make an envelope to go with it in pink.
Birthday Bicycle
So, those cards I destroyed and didn't get started the other evening, I finally made them on Sunday night once the kiddies were in bed! Yay! This one is for a friend whose birthday is this week. I think it suits her because she's literary and we met at library school.
I started with an A6 pre-cut card and cut a piece of backing paper slightly smaller from Dovecraft Curiosity Corner 6"x6" paper and stuck it to the card front with double sided tape, leaving a small white border. I then layered up a couple of strips of Bazzill card in matching colours - I love the muted greens and browns I found in my mini stash - onto the backing paper with some tacky glue - I'm still getting to grips with what glue I like and I like this, but I think it made the card a bit wet and it warped slightly. I then stamped the bicycle from the Good Times collection from Clearly Besotted onto the die cut bicycle using Ranger Archival ink in jet black (that was a pain to clean off!). I'd cut the die out ages ago onto some cream Bazzill I had to try it out and it came in very handy. I attached it to the card front with some foam pads. I then stamped the sentiment onto some Bazzill card stock and rounded the ends using the reverse punch on the WRMK envelope punch board - that's come in very handy indeed! - and affixed to the front with foam pads.
Still haven't had a verdict from my friend, but my husband gave it a big thumbs up!
I started with an A6 pre-cut card and cut a piece of backing paper slightly smaller from Dovecraft Curiosity Corner 6"x6" paper and stuck it to the card front with double sided tape, leaving a small white border. I then layered up a couple of strips of Bazzill card in matching colours - I love the muted greens and browns I found in my mini stash - onto the backing paper with some tacky glue - I'm still getting to grips with what glue I like and I like this, but I think it made the card a bit wet and it warped slightly. I then stamped the bicycle from the Good Times collection from Clearly Besotted onto the die cut bicycle using Ranger Archival ink in jet black (that was a pain to clean off!). I'd cut the die out ages ago onto some cream Bazzill I had to try it out and it came in very handy. I attached it to the card front with some foam pads. I then stamped the sentiment onto some Bazzill card stock and rounded the ends using the reverse punch on the WRMK envelope punch board - that's come in very handy indeed! - and affixed to the front with foam pads.
Still haven't had a verdict from my friend, but my husband gave it a big thumbs up!
Sunday, 15 February 2015
Bicycle Note
During baby's long nap on Thursday I also managed to rustle up a little note card. I'm liking that I'm building up a little card collection to dip into as and when I need one.
For this, I just used a pre-cut A6 card blank. For some background colour, I used an off cut of the light green Bazzill Cardshoppe I had left over from Valentine's Day card. I then topped this with a die cut circle of white Bazzill Basic, using one of the Spelbinders Nestabilities Small Circles. The bicycle is from the Good Times die collection from Clearly Besotted and is cut from Bazzill Bling cardstock in pink. I love the bicycle. It's the best purchase so far as I've used it several times already, along with the co-ordinating stamps. I stuck it onto the circle with foam pads. The sentiment is stamped in Memento Tuxedo Black from Clearly Besotted's Sweet Little Sentiments stamps (my latest purchase). I added a couple of stick on crystals and there you are. Now, who to send it to?
Friday, 13 February 2015
Where do you start with that stash?
I'm still getting a stash together and working out my own style. I've watched a bit of Create and Craft in my time, and I was kindly given some Tattered Lace dies for Christmas. These are hugely popular, and highly intricate, but I have yet to find a project for them.
I decided to buy a copy of Simply Cards and Papercraft and this is where I discovered some things I really do love.
In no particular order, just a snapshot of what I've learned in the past few months of crafting about what to buy:
1. Clearly Besotted Stamps - Excellent quality stamps and dies. I love their simplicity, price and the fact they come beautifully wrapped in pink paper with a thank you written on your order sheet. They are also super speedy at sending them in the post for very reasonable postage costs. Not working at present hampers my aim to own as many of these as I possibly can. It hasn't stopped me buying a few though! The free ones from Simply Cards and Papercraft no. 133 are an added bonus :)
2. Derwent Inktense Watercolour Pencils - I know a lot of people use pens for colouring - Spectrum Noir, Copic Markers, Promarkers and now Chameleon - but I could only find them in big packs and didn't want to spend the money. After seeing the article in Simply Cards and Papercraft, I bought three in red, yellow and blue and I really like them. It makes me feel very arty! My first attempt at using them, however, I realised I needed some proper waterproof ink..... I now own some Ranger Archival Ink!
3. Bazzill Cardstock - I find the whole paper and card thing quite confusing. All the different weights etc. I started using and still do some pre-cut and scored cards and envelopes from Hobbycraft, which I find very useful and easy. When doing projects from magazines, however, I found it confusing, and so I sought some advice online and had a look at Michelle Short's video on cardstock. I found I really really like Bazzill Card. I love the texture of it. It feels so nice to craft with. Samuel Taylors in their Embsay store has a very good collection, but I didn't manage to get any of the white Bazzill Cardshoppe on my last trip. Means I have to go again. What a chore!
4. Inks - Thanks again go to Michelle for her video on ink pads. I now know the difference between pigment and dye and have a few VersaMagic Dew Drops. There are so many different colours though, I have to be careful with my pennies and am slowly building my stash.
What are your favourites and where did you start? Is there anything you wouldn't be without? Are there things you have you find you never use?
I decided to buy a copy of Simply Cards and Papercraft and this is where I discovered some things I really do love.
In no particular order, just a snapshot of what I've learned in the past few months of crafting about what to buy:
1. Clearly Besotted Stamps - Excellent quality stamps and dies. I love their simplicity, price and the fact they come beautifully wrapped in pink paper with a thank you written on your order sheet. They are also super speedy at sending them in the post for very reasonable postage costs. Not working at present hampers my aim to own as many of these as I possibly can. It hasn't stopped me buying a few though! The free ones from Simply Cards and Papercraft no. 133 are an added bonus :)
| I am so happy when I get the package in the post! |
2. Derwent Inktense Watercolour Pencils - I know a lot of people use pens for colouring - Spectrum Noir, Copic Markers, Promarkers and now Chameleon - but I could only find them in big packs and didn't want to spend the money. After seeing the article in Simply Cards and Papercraft, I bought three in red, yellow and blue and I really like them. It makes me feel very arty! My first attempt at using them, however, I realised I needed some proper waterproof ink..... I now own some Ranger Archival Ink!
3. Bazzill Cardstock - I find the whole paper and card thing quite confusing. All the different weights etc. I started using and still do some pre-cut and scored cards and envelopes from Hobbycraft, which I find very useful and easy. When doing projects from magazines, however, I found it confusing, and so I sought some advice online and had a look at Michelle Short's video on cardstock. I found I really really like Bazzill Card. I love the texture of it. It feels so nice to craft with. Samuel Taylors in their Embsay store has a very good collection, but I didn't manage to get any of the white Bazzill Cardshoppe on my last trip. Means I have to go again. What a chore!
4. Inks - Thanks again go to Michelle for her video on ink pads. I now know the difference between pigment and dye and have a few VersaMagic Dew Drops. There are so many different colours though, I have to be careful with my pennies and am slowly building my stash.
What are your favourites and where did you start? Is there anything you wouldn't be without? Are there things you have you find you never use?
Subscribe to:
Posts (Atom)