Showing posts with label Simply Cards and Papercraft. Show all posts

Wednesday, 15 November 2017

Card Concept #82 & Magazine Makes #8

Well, there's no let up from me with the Christmas cards, I just can't seem to stop, and this fortnight's Card Concept Challenge #82 Retro Holiday is the inspiration for this one.


When I saw the inspiration photo, all I saw was pink and silver and sparkle, so this card is definitely going all out with that.


I saw one of Justine Hovey's videos a while back showing how to make this layered card. I've used a beautiful stamp that came with Simply Cards and Papercraft issue 169 and some seriously sparkly sticky backed paper which I stuck on top of some white card stock. The embossing is in some Papermania silver on MFT black cardstock.


I hope this gives you some inspiration to play along and join in and get even more Christmas cards made :)

Happy Crafting one and all!

Thursday, 18 August 2016

Magazine Makes #4 - Distance Seems So Little

Hi All. well, we're done on holiday number two - it's been that kind of month, but hey, no chance for anyone to get bored!

My copy of Simply Cards and Papercraft arrived a couple of weeks ago in between holidays and when I saw it, I knew I had to play with the stamps straight away. It happily coincided with a much needed TV break for the kiddies, so I had 20 minutes of uniterrupted play time to colour. I finished the card later on in the day.


I started by stamping out the hummingbird and one of the flowers from the set onto water colour card with archival ink using my MISTI. Sometimes I find stamps from the magazines don't stamp very well, but these were excellent first time.

I then coloured in the hummingbird using my Spectrum Noir Sparkle pens. I squeeze some out onto a small pallet and colour with a brush as I find them too juicy to work with on their own. I coloured the flower in with Spectrum Aquas.


Then came the fun bit - fussy cutting. Yep. It's lucky the Proms are on at the moment so I had good music to accompany me on Radio 3!

I wanted to give the impression of a sun in the background, and I searched for a colour I was happy with. How lucky that I've been hoarding this beautiful pomegranate Bazzill paper for ages and I thought it was just the colour. I cut it out with one of my Spellbinders circle dies.

I put it together really simply. Just a folded A2 (US) card base, with the sentiment stamped in the bottom right hand corner, the 'sun' in the middle and the hummingbird and flower popped up on foam pads.

I hand drew the border with my Copic Spica Glitter pen and a Uni-ball Fine Line 0.2.


Below is a list of what I used to make this card. Please note that I DO NOT USE affiliate links.


It's currently on its way in the post, so I hope they like it as much as I do. Thank you so much for taking the time to read and to comment, you do mean so much to me!


Thursday, 5 May 2016

Magazine Makes #2 - Altenew Roses

Why Hello! How's it going down or up your way? First, the weather in Yorkshire, and then I'll move onto cards ;) - it's been abso-bloomin' gorgeous - summer coats are on and suncream is out! 

Now that that is out of the way, welcome back to another Magazine Make! This time I am using the free Altenew layered roses stamp that came with this month's issue of Simply Cards and Papercraft #149. I actually received it mistakenly with issue 148, thus giving a heads up to a lot of you that it was coming out and I have loved seeing all your creations.


It comes with both a stamp and a die set, so it's definitely worth a punt. I've not had a lot of experience with layering stamps and I did a few test runs doing it by eye, before moving onto using my Letterpress. It definitely benefits from using a stamp positioner. Tragedy has however struck my Letterpress, as after using it to make the elements for this card I overpacked it on another project and it cracked right down the middle. 


I don't want to put anymore stress on it using it as a stamping tool, so I took the plunge and managed to get myself a good deal on a mini MISTI (20% off shop wide at Sprinkle Twinkle!) and will be giving that a go when I get the chance, and hope to get a review of it to those of you who asked over on IG.

Anyway, back to the card.


I stamped the flower and leaves using my blue and green Altenew inks - you do need a good selection of colours for stamp layering and these inks are great for it. I then die cut them out. The back panel was created using the Letterpress and a gorgeous flower plate in a lovely teal blue ink.


I die cut the panel using my SSS stitched rectangle die and then used it to die cut a strip of vellum I had from stash. I then stamped the greeting onto the vellum with Versamark ink and embossed it with WOW! Gold embossing glitter. Sparkly!

I adhered the vellum to the panel with some magic film - it worked quite well as you can't see the glue at all - and then attached the flower and leaves using my ATG.


Below is a list of what I used to make this card and where I purchased them. Please note I DO NOT USE affiliate links.


I'm rather pleased with how this turned out. Layering stamps are all the rage at the moment, so if you want to try something without paying a lot, you could do worse than buy this magazine and have a play.

Thank you as always for stopping by. Have a great weekend when it arrives!

Friday, 1 April 2016

Magazine Makes #1

Hello fellow craft addicts. How has your week been? I bought a piano!!! Can't wait for it to be delivered and have a good ole play. I'm incredibly rusty, but it's all about getting back into it.

I'd better explain the title, hadn't I? You all know that I subscribe to Simply Cards and Papercraft, and occassionally get another magazine here and there as gifts from my lovely husband. I read them, enjoy them, I get all inspired, do a bit of stamping, and then I tend to put them away, so this 'series' that I've called 'Magazine Makes' is my way of reminding myself of the great gifts we get each month and of the great techniques that they showcase too.

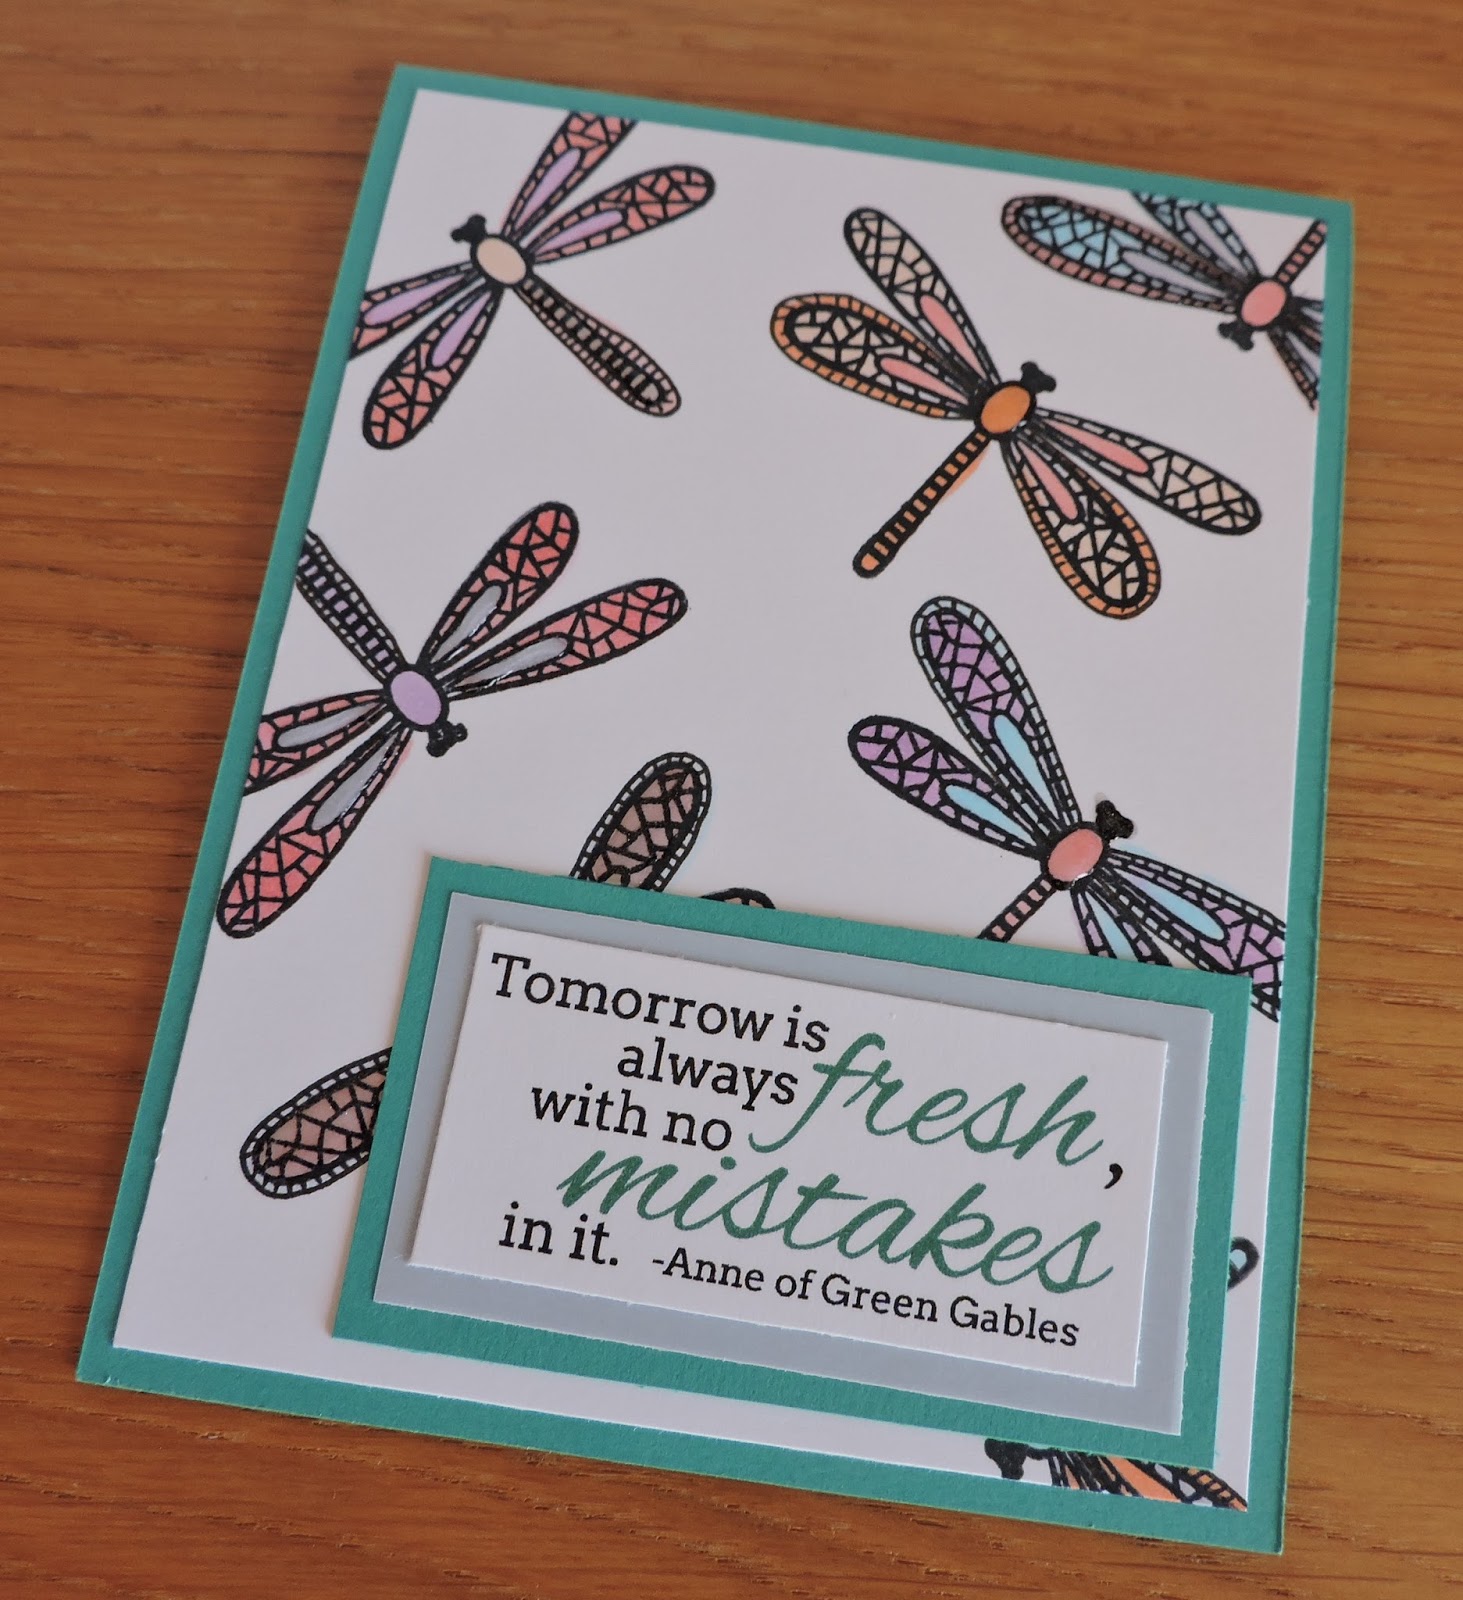
First up is this card using the dragonfly stamp from issue 134 of Simply Cards and Papercraft along with a digital stamp which I bought from MHK Designs. I've been reading all about manipulating digital stamps in issue 146 of Simply Cards and Papercraft - and this one came with free Clearly Besotted Digi stamps too!!


I started out by randomly stamping the dragonfly onto some Neenah cardstock using Memento Tuxedo Black and adding some additional detail to them using my Copic Multiliner 0.3. I then coloured them in with very light Copic markers.


I then got to work on my digital sentiment. I loved this as soon as I saw it on Mynn's Etsy shop. I love Anne of Green Gables and watched the mini series every time it was on in the early 90's. It just seemed such a lovely sentiment to have with the dragonflies.


Armed with Jo Kill's instructions I loaded the image into my free software. I used GIMP like Jo does as that seemed easiest. I got to a certain point then I really struggled to change the colours, so I did a bit of internet searching and came up with a useful tutorial which helped me work out which menu I needed and which bits I had to select. I changed the colour of the words 'fresh' and 'mistakes' and the size of the sentiment and then printed it out on Neenah card stock. It took me several attempts and I tried with ordinary paper first before I was happy with it. 


I then layered the sentiment onto vellum (I know it's a bit squint which annoys me no end!!!) and then onto some of my teal Lawn Fawn card. I attached the dragonfly panel to an A2 card made from the same LF card and then the sentiment on top. I then decided it needed some Wink of Stella and Glossy accents on different parts of the dragonflies.

Below is a list of what I used to make this card and where I purchased them. Please note I DO NOT USE affiliate links :)


I'm definitely going to try again with digital stamps. My next plan is to work out how to add sentiments onto digital images - that confused me a bit as for some reason I couldn't move it into place. More learning, it's all good!!

Thank you so much for reading, and I wish you all a fabulous weekend.

Blog design by aleelilydesigns