Showing posts with label Clearly Besotted Stamps. Show all posts

Wednesday, 5 July 2023

Flowers are Forever...


Photograph of a card on an orange background with Copic marker pens on the left and the stamp set used on the right. The image on the white card is of a small bear holding a flower. The sentiment is 'Good Luck'

How many of you have been with me on my journey from my very first card way back in 2015? Can you remember when I joined The Flower Challenge? A card making challenge set up by one of my very earliest card making buddies, Aileen. Well, don't be shocked when I tell you it was 7 years ago. Truly it is because this month they are having a challenge and a celebration as Aileen and Viv retire.

I was touched when Viv emailed me to ask me to join in with this challenge. I've hardly been in touch and it has been nearly 2 years since I last blogged anything, but I couldn't say no.

I've been getting back in to card making, mostly thanks to my friend Kylie who lives a 20 minute walk from me and is a Stampin' Up demonstrator. I've got back into going to her monthly card classes and now that I'm gainfully employed in retail with a regular salary again, I've been saving up for some new purchases. Watch this space for more cards to come!

This challenge is Anything Goes, which can be a double edged sword really with having to decide without any restrictions and that means endless possibilities with a whole host of stamps I could use. In the end I decided to use the Sweet Floral Friends stamp set from Clearly Besotted to make a couple of Good Luck cards.

A hand coloured image of a small brown bear holding a daffodil on a white card background. The sentiment says 'Good Luck'

In my usual style it's pretty simple with an image coloured using Copic markers popped up on foam pads onto a white background and a coloured card base. I do love the Stampin' Up card stock for their vibrant colours. The sentiment is from the set.

So this is a way for me to say to Aileen and Viv, Thank You for giving me the opportunity 7 years ago to join a great team, I'm glad that it's still around and going strong and Good Luck to you stepping down and to Karren taking on the mantle of leadership.

Photograph of a card on an orange background with Copic marker pens on the left and the stamp set used on the right. The image on the white card is of a small bear holding a daffodil. The sentiment is 'Good Luck'

I hope you'll join in, after all, Anything Goes!

Happy Crafting, Ruth x

Wednesday, 8 April 2020

Clearly Besotted Mr Mole

Here we are in Week 3 and the odd thing is it's starting to feel normal! Hope you are still bearing up. Without further ado, here's my card....

  I've had these stamps for a while and one evening a few weeks ago, along with a whole load of things, I decided to colour them in. I struggled to get the right browns, but I did a lot of blending and came up with something that seemed to work!

I'm enjoying making all things sunshine and rainbows at the moment, so I decided Mr Mole would be popping out of the ground to look at the glorious sunshine. He might have bad eyesight, but he can still make out when it's lovely and sunny.


The sun is keeping me going and it's almost Easter, so the sun is bringing a whole load of hope to the world.


A quick one from me today, but sending you all the requisite virtual hugs and a reminder in these times to keep on crafting :)

Friday, 7 December 2018

Christmas Owls and Moose - Clearly Besotted

Why hello! So, now that my birthday is over, I'm going into Christmas organising full tilt. How I'm doing is debatable, but the will is there! I wanted to get at least 30 Christmas cards made and today I finished up another four to finally get there. I then decided to write my list for handmade cards and realised I needed 40..... so another 10 will have to be found from somewhere soon!


Anyway, here are the four I made today from Clearly Besotted Stamps supplies. Some very simple Copic colouring on the owls and moose before I fussy cut them. Then I masked of a central piece in on the card blank and lightly dusted different light Altenew inks onto them through one of the new  Clearly Besotted stencils. This one is birch background and the inks are very light through them, and the photo doesn't do it justince. I then just glued on the moose and owls. 

 
I then found an old set called Sweet Little Sentiments, which at one point I was going to sell and I'm glad I didn't. The Merry Christmas fited just nicely and I inked it up with some VersaFine Onyx Black as it give such a clean impression first time round.


That, as they say is that!


I did my first ever Christmas Fair last weekend. Just a little one in the school. Oh my was I nervous, but I've had so much support from all my friends and family, it really kept me going. I had a couple of 'too expensive' mutters, but apart from that it was very positive - and exhausting. If you want to find out what I've been up to with my sewing, you can follow my adventures on Instagram and Facebook, as well as my Etsy shop itself.


So I'll be back before Christmas I hope with some more cards now that I have to make those extra 10!

Thanks so much for stopping by, Happy Crafting Everyone :)


Friday, 17 August 2018

My First Box Card

If you've been following my recent exploits on Instagram you'll have seen me advertising that I was going to make a box card. Well. I did! I've never made one before, feeling that they were quite a lot of work and I'd need at least a week to make one. 


Well, turns out they aren't too bad after all. I watched Ale Suta's video and had a read of this tutorial from Papermill Direct. Once you've worked out the basic principals of the box card, it's not too difficult to put it all together.

I finally got round to colouring in all these images from the Go Wild Again set from Clearly Besotted. I used my Copic markers and then fussy cut them out. A poll on Instagram suggests many of you don't like fussy cutting, but I LOVE it, so I even cut out the little frogs.

I made up my box card with some Stampin' Up papers I hadn't got round to using yet, and attached all the images with thin strips of acetate. The box card then folds down to a nice square size and then will pop up again quite happily.


They really look very effective, and although they take a bit of time to put together, the results are worth it. Definitely one to do again.

Thanks for popping by!

Saturday, 30 June 2018

Swim By Anytime

Hello! I'm getting in a very quick post as a last minute attempt to get a card in for the current Copic UK Facebook Group challenge. As usual it's anything goes, but with additional challenge of paper piecing with some Copic colouring on top. Now you know I love paper piecing, and finally I got round to it - only 4 hours to go!


I finally used this adorable diver set from Clearly Besotted called Under the Sea which I hadn't used before - yay for NBUS! - and stamped it onto different pieces of scrap cardstock. I think it's all Lawn Fawn. I stamped using Memento Tuxedo Black as I knew I was using my Copics on it later. I stamped his head and hands onto Copic card stock and coloured his head and hands with Copics.

I fussy cut, and I fussy cut, and I fussy cut some more! I then happened across a blue card blank I'd cut ages ago but decided wasn't right for the card. Well, it was perfect for this one. I stamped the diver onto it and with some acrylic glue, stuck all the pieces on top. I added the jelly fish, seaweed and fish around him. I then added a bit of added colour with my Copics, but you really can't see the different in the pictures I'm afraid. I was quite cautious, except with the choice of orange for the fish and jelly fish!!

I then took a wave stencil (mine is from Create a Smile) and with a piece of cut n dry foam, dabbed on some white pigment ink to give some added texture.

The sentiment is also from the set and just stamped using VersaFine Onyx Black onto some white card stock.


I'm linking this up to the Simon Says Stamp Wednesday Challenge #51 which is Anything Goes and also Pixie's Snippets Playground Challenge #329 which I haven't played in for a while and is perfect for this card.

Thank you all for visiting today and Happy Crafting :) 

Wednesday, 25 April 2018

Crafty Weekend Makes #2 - Fairy Power

Thank you all so much for your kind comments about my colouring for Copic 4 that I posted on Sunday. I really do think I have grown in confidence since doing it, and it's made me want to keep practising when I can. I still have so much to learn - light source and shading is my constant bugbear - but when people are encouraging it makes you want to go on! 


This card was made on my recent crafty weekend with Lisa and Steph. Isn't this fairy utterly adorable? It's from a recent Clearly Besotted release and you know I can't resist those stamps.....

I started out by making my background panel with my Gansai Tambi Pearl Colours - yes, I will be getting the Gem Colours at some point, I can't resist these paints! I used them all to get rainbow colours.

I then took three die cuts of the MFT Snowdrifts Cover Up and glued them together and adhered them to the pearl background. 


I then took a long time to work out what I wanted to have on top and I decided with all the pretty colours, the fairy was perfect. I coloured her with the Copics I'd taken with me and fussy cut her out.

It was a pretty quick assembly when I got home onto a white card blank with the fairy on top. As usual, I couldn't decide on a sentiment, so have left it blank. Sometimes a pretty fairy card doesn't need a sentiment, right?


I'm going to link this up to the Simon Says Stamp Wednesday Challenge which is showcasing MFT and also Anything Goes.

Thanks so much for stopping by, it is truly appreciated, and as always, Happy Crafting! 

Wednesday, 21 March 2018

Mermaid Week - Day 3 - Clearly Besotted

You know how much a fan I am of Clearly Besotted and have been since I started stamping and colouring over three years ago. Pretty much most of my stamp collection is Clearly Besotted. I love that they are a UK company too! Easy to get and easy to ship and usually arrives 1-2 days after ordering.

One of their recent releases was this mermaid stamp, and this was the trigger for me thinking about having Mermaid Week.

For these cards I've used my Gansai Tambi and Gansai Tambi Pearl Colours. I used some Hahnemuhle watercolour cardstock for this. It is very thick and I tried wet on wet watercolouring but found that the water soaked into the paper too quickly and I just didn't manage to get it feeling right for me. It works really well for blending with distress inks though, so I shall use it for that.


I went for a loose messy look with the mermaid sitting contemplating. I do love my Pearl Colours. They have just brought out some gloriously bright Gem Colours which of course I have to have!

I just simply die cut it with my Lawn Fawn large stitched squares and mounted it onto a 5x5 inch square card.

Keep sharing your stuff over on Instagram with #ruthsmermaidweek and most importantly have some crafty fun with your stash! It's just for a little bit of fun!

Saturday, 24 February 2018

Happy Birthday Lisa!

A birthday card for my crafty friend Lisa, who is not only kind and caring but super talented too, so if you haven't ever visited her blog, My Card Trip, please take the time to do so today. You won't be disappointed.

If you have had a wander around her blog and various other social media sites, you'll notice she loves flowers and Clearly Besotted, so I combined the two - as I did with my card to her last year. 


I fussy cut the flower, which took me a good while, but it's something I really love doing, and then found a card base which I'd stencilled with some embossing paste using a stencil that she bought for me. That's something she's introduced me to recently, stencils and how versatile they are.


I adhered the flower using some tiny foam pads I had, just to give it some dimension. I think sticking those on was more frustrating than the fussy cutting. I left the sentiment off as I tend to do these days with a big image. I'm never sure where to put it.

In addition I also sent her this quirky gift. I hope she's laughing because I asked her for her head circumference ages ago and I don't think she ever worked out why. This goes back to a conversation we had when I first started sewing about her needing an eye mask. I wonder if she remembers, because I did and finally I got round to making one. Not my best work and not something to go into production with, but I had a lot of fun sewing it, and I hope she gets a chance to use it on a sunny day relaxing in her back garden with a glass of vino.


A very very happy birthday Lisa!!

Thanks for taking the time to pop by, see you again soon and happy crafting.

Monday, 18 December 2017

A double birthday!

Two crafty friends just happen to have a birthday on the same day, and I actually managed to get a card out to both of them on time - in fact about a week before the date. Seriously, that just never happens!

So here they are:


First up is Steph. I've linked to her YouTube channel because you need to check our her pencil colouring videos. On account of those coloured pencil videos, I've coloured in this beautiful Clearly Besotted floral stamp with Polychromos pencils. Pencil colouring takes quite a bit of time, but it is so worth it to see the layers build up. I'm hoping she will forgive me the mistake in colouring two leaves as petals instead!

And then there's Natalie, who I was lucky enough to meet up with in October at a nearby stamp show. Always lovely to see some one you've only ever chated to online. Natalie is superb at Copic colouring and loves Stamping Bella, so that's the inspiration for this card - been dying for the right card for this Edna stamp.

A very very happy and crafty birthday ladies and happy crafting everyone else!

Saturday, 29 July 2017

Dream Big - Clearly Besotted Stamps and Polychromos Pencils - VIDEO

Hello again Everyone. I'm enjoying making videos at the moment, so I have another card from the last Clearly Besotted release (not long now until the new one!) that I've coloured with Polychromos Pencils. I got these for Christmas 18 months ago and I need to get them out of their case more often!


I started by cutting a piece of white card to A2 (US) size and then die cutting it with a stitched rectangle and then with the MFT stitched Peekaboo frame die.

With an A2 white card base and my Precision Press, I stamped the pianist and the curtains in Memento Tuxedo Black. Even though I'm not Copic colouring, it's a nice black ink that dries quickly.


I then proceeded to colour with my pencils, and you can watch it all in the video below or over on my YouTube channel.


I stamped the sentiment on the front with VersaFine Onyx Black ink and then popped it on the card base with foam tape - as you can tell from the video, that didn't quite go to plan, but I'm still pleased with how it all turned out.


Thank you so much for taking the time to visit me today, and I hope to see you all again soon!

Saturday, 22 July 2017

Follow Your Dreams - Schoenberg and Clearly Besotted Stamps

Hello Everyone! How are you all? Can you believe it's almost time for another Clearly Besotted release already? I do appreciate them quarterly now though, as I actually get the chance to play with the ones I bought in the last release before the new one comes along.

I made this card at around 5am one morning when I really could not sleep and my head was swimming with a million and one things, so the best thing to do was to go and craft.


This is a card I've been thinking about since my stamp sets arrived and it finally made it onto paper, or card for that matter. It's inspired by one of my favourite pieces of music, Verklarte Nacht by Schoenberg. I've taken a bit of a liberty as it's a string quartet, so no flute, but they worked so well together I couldn't not have them.

I started by stamping the two figures onto Copic friendly card stock and then masking them off with masking paper before stamping the tree background on top. I love the magic of removing the masking paper!! I then coloured them with Copic markers, using three yellows for the moon shining through the trees. 


I die cut the panel with a stitched rectangle die from Simon Says Stamp and adhered it to a white card blank with foam tape. I stamped the sentiment on the bottom with VersaFine Onyx Black.

Thank you so much for visiting me today, and for all your comments. Happy shopping when the time comes ;)

Thursday, 29 June 2017

Happy Birthday, Auntie Rachel!

I don't know about you, but I tend to buy stamps with cards in mind for specific people. As soon as I saw the poodles set from Clearly Besotted Stamps (yay, they are back!!!), I knew they were perfect for my French teacher sister. 

Obviously I had to have a poodle, and some shopping bags on there - she loves shopping and I'm always amazed at what she picks up in charity shops for next to nothing (a Brora cashmere jumper that just needed a little bit of extra sewing for one.)


I started with a piece of Make It Colour! Copic card stock and stamped everything with Memento Tuxedo Black. I then did some Copic colouring of the poodle - they have to be pink, don't you think? And then I found some snippets of patterned paper and did a bit of paper piecing on the bags. I added the ticks in bright pink.

I took a white A2 card base and stamped the French speech bubbles around the outside in different shades of pink and then cut my card panel down and popped it on top with some fun foam.


You'll notice there's something missing here. I used to have a set of links to the products used on my cards around about here. It was powered by InLinkz who are changing over to a product called LinkDeli. In doing so the price goes from roughly £5 a month to £25. Although I was part of the Simon Says Stamp affiliate programme, I earnt very very little from it (like pence in 6 months), I just liked having a central database for my purchases. So I hope you will understand it's just not worth it for me to continue with it. My previous posts will no longer have the links available, so I may go back at some point and tidy them up. I enjoyed using it, but finances have to come first and it no longer seemed a viable option for me.

Thank you so much for popping by today. We're almost at the weekend, so enjoy it when it comes :)

Friday, 12 May 2017

Spinner/Slider Card with Clearly Besotted Stamps - VIDEO

Hello again my crafty friends! Thank you all so much for taking the time to watch my craft room tour and for all your lovely comments. I am loving my space and try to escape here as much as I can.

I managed to film a card making video this week showing this cute penny slider/spinner card I made with Clearly Besotted Stamps. They reopened at the end of last week with a new release and I couldn't be happier.

Onto my card:


If you've followed me for a while and watched my last card making video, this will look familiar. It's melonizing time! If you're not familiar with melonizing, or melonentierchen to give it its proper title, it's simply a silly and fun challenge to colour things to look like melons. You can follow Danie on Instagram to get more inspiration - she's the crafty lady who came up with it! 

I'll not go into much detail as my video tells more - although I confess I rather over edited to get it down to a decent length, so apologies that some of it skips a bit. I've also kept it in real time. I am still finding my feet with videos, so I hope you'll bear with me. I appreciate all your support!


And here's the video:


Here is a list of the supplies used on this card. I have signed up to affiliate links on some products. If you purchase any item after clicking on an affiliate link (currently Simon Says Stamp), I will receive a small commission at no extra cost to you. This helps in a small way to support the running of my blog and is very much appreciated, thank you! 


I absolutely love this challenge, so I hope you'll stop by and give it a go - it really is great fun trying to find the oddest thing to turn into a melon.


Thank you so much for watching and for your continued support. Wishing you a fabulous weekend wherever you are and whatever you are doing!

Friday, 24 February 2017

Happy Birthday Lisa!

Today I'm posting a card to wish Lovely Lisa from My Card Trip a very very very Happy Birthday indeed!

Lisa is celebrating a big birthday... you can kinda tell that from the card..... 


Lisa has been such a lovely crafty friend over the past year or so. She's listened to me be sad and happy, been understanding when I've tried to give up buying crafty supplies and failed (and also sighed, quite rightly so!), and just generally been great.

I wanted to make a card with a flower image because that's what she's amazing at, and add in a bit of me too - the sewing!


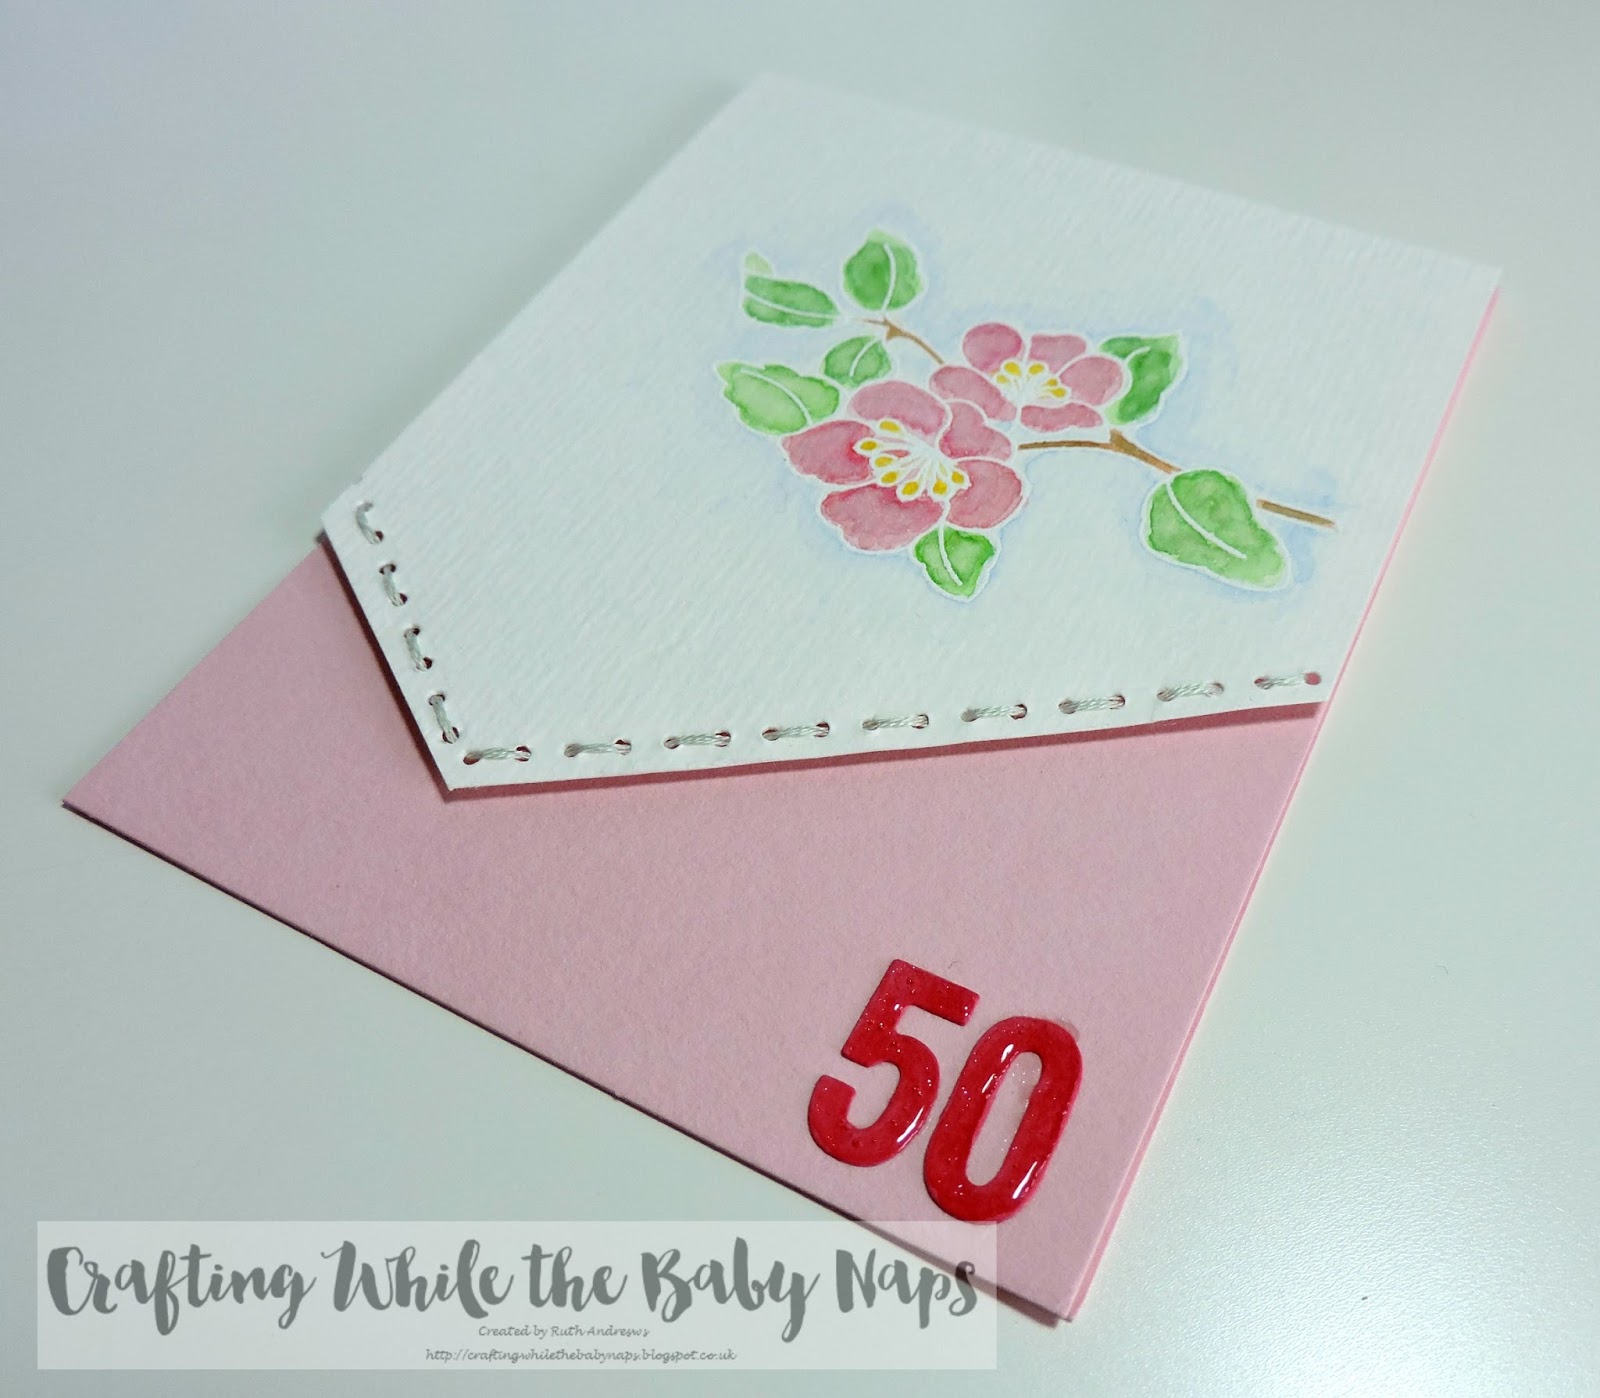
I heat embossed this Clearly Besotted flower that Laurie very kindly sent me (now retired) - one of several she no longer wanted to use - in white embossing powder onto water colour card and then set about colouring it in with my Gansai Tambi paints. I added some blue shading for depth and also some of the Starry Water Colours for some light bling.

Once it was dry, I die cut the edge of the panel into an offset V shape with my Reverse Confetti edge dies. I then sewed some grey embroidery thread (you Americans call it floss, which to me is something you clean in between your teeth with!) in the holes. I popped it up with foam tape onto a pink A2 (US sized) card base and added the little '50' which I found in my stash. I covered it in Spectrum Noir Sparkle pen and lots of glossy accents - I'm hoping she will forgive the little splodge!


Here is a list of the supplies used on this card. I have signed up to affiliate links on some products (currently only Simon Says Stamp). If you purchase any item after clicking on an affiliate link, I will receive a small commission at no extra cost to you. This helps in a small way to support the running of my blog and is very much appreciated, thank you! 


So, Happy Happy Birthday Lisa, here's to more chats, more crafting and an altogether fabulous year! Thanks for stopping by :)

Blog design by aleelilydesigns