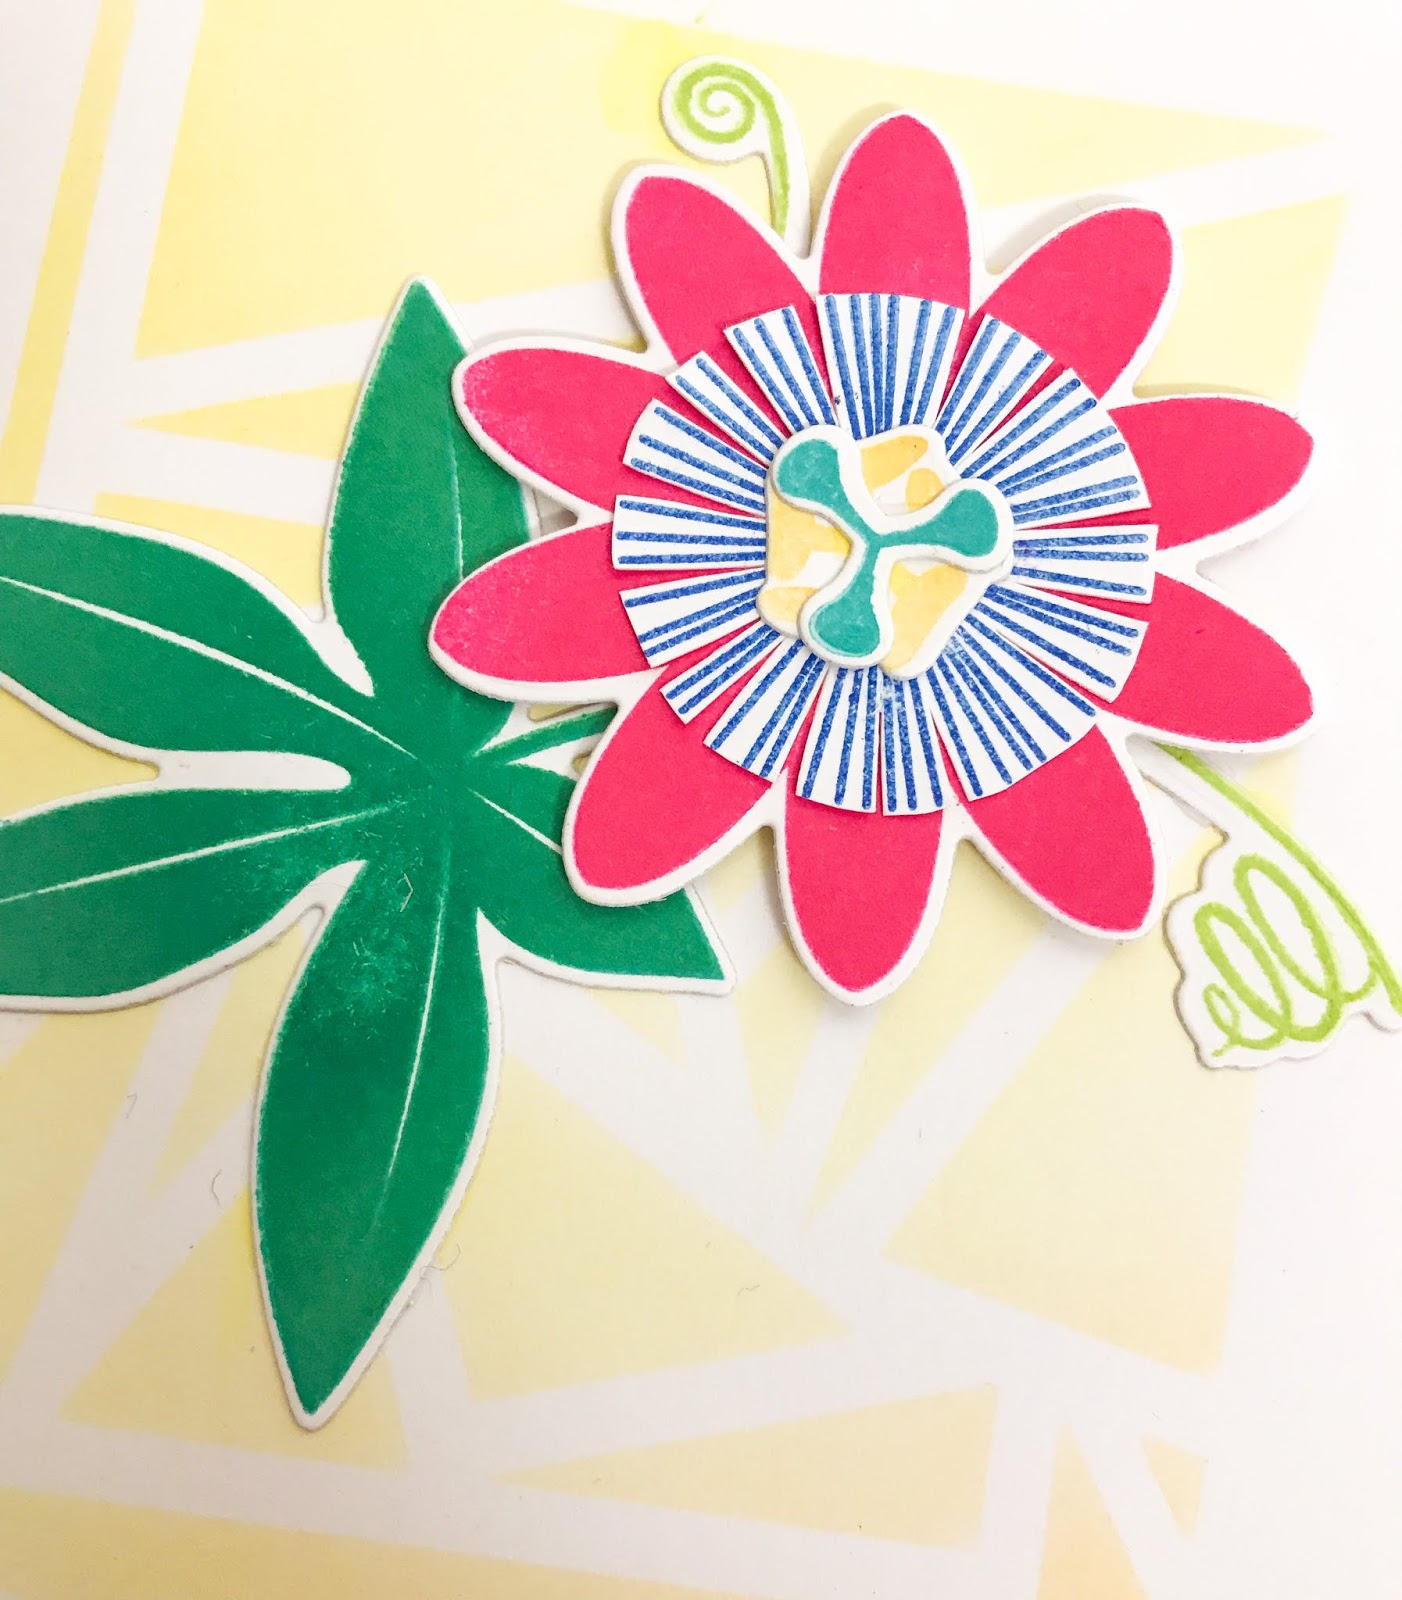
Welcome back to Day 4 of the Uniko February Release. Today we are introducing a floral set called Passiflora. We had one of these flowers in our garden in Scotland, that amazingly my mother grew from a seed. It's a climber with little tendrils and I can remember seeing it curling round the branches of the dead plum tree we had at the very back of the garden. It flowered every year and one year we had a fruit. It never really ripened though, but we enjoyed disecting it!
There are so many elements to this and you can build up layers by stamping. There's also an outline that you can colour in too. I've gone very much off the natural colours and built up my plant with bright colours from my Ranger Dye Ink sets that haven't seen much of the light of day for a long time. They are so bold though that they were perfect for this set. I masked off a background area on the card base and used some yellow and orange distress inks with the Abstract Triangle stencil (see Tuesday's post) to create the background. I then stamped all the separate elements of the flower and die cut them out. It was then just a case of building up the flower in the corner. I will admit I had to look at a picture just to check my memory was correct where all the different bits went!
A sentiment from the set in the bottom corner finished the card off nicely. I think this is my favourite from the release so far! Tomorrow I'll be sharing the last new set and then tune in on release day on 11th for the blog hop and a fun way to win the entire release! Happy Crafting Everyone!
Here we are on Day 3 already and I think you can probably tell just how much fun I've been having with the Uniko February release so far. Today it is the turn of a quirky small background stamp called Graffiti Texture:
This has a grungy and mixed media look to it, and it's something I would never have picked up, but I had a lot of fun with it. It's great for texture - like the name suggests!
I thought with Valentine's Day coming up, I might as well get a little romantic with this set. I took the graffiti texture block and stamped it onto various shades of cardstock with some Versa Mark ink. I then took some clear embossing powder and heat set it. I had an MFT heart die in my stash and cut out one from each piece of stamped cardstock. I felt it would look too CAS on a card blank on its own, so I added some dry embossing with another MFT rectangle frame die I have that doesn't get much use, but was perfect for this - it's been used 4 other times now too!
Using my stamping tool, I then stamped the sentiment above and below where the heart would be and stamped in VersaFine Onyx Black.
I added a little detail on the inside with some of the smaller images from the So Much Clear Stamp Set (I get a lot of use from this little set, I love it!) and that was it.
Not long to go now until release day on Monday 11th and a fabulous giveaway. Hope you're enjoying all the intros from all the team!
Here I am again with another sneak peek and a card for Day 2 of the Uniko February Release. Today we are sharing a new stencil and a new very useful birthday sentiment stamp set.
I love Uniko stencils and I particularly like this one for its quirky design. It's called Abstract Triangles. I masked the stencil to give a border on a white card base and then did some simple ink blending through it in sunset colours (Picked Raspberry, Spiced Pumpkin and Mustard Seed).
I found some raspberry pink card stock in my stash and stamped and heat embossed the sentiment onto it with some Versa Mark ink and Wow! Bright White Fine embossing powder. I then trimmed this into a panel and used a We R Memory Keepers corner chomper on the edges. I wasn't sure about this as the abstract panel is very angular and the sentiment had very rounded edges, but the next day I really liked it! I simply added the sentiment on top with some foam pads.
How are you all enjoying the release so far? I'm enjoying sharing all my makes. Please stop by all the DT members and Bev to see what they've created too. I'll be back tomorrow with another card. Happy Crafting Everyone!
I am delighted to be back as GD for Uniko, most especially as it is their 7th Birthday. For any company to get to 7 years is a huge achievement, and most especially for a small company. My hat is off to Bev and all that she does. Having started a small business last year, it's hard, hard, hard, hard work, but so rewarding!
Today we are introducing Big & Bold Happy, a stamp set with coordinating dies:
I've used the dies that coordinate with the stamp set to add some big & bold writing to this birthday card.
I've die cut the happy word from some scrap cardstock in shiny dark blue and the bigger outline in vellum to add contrast.
The balloon bash stencil was ideal to add something into the corner of the card and I used some distress oxide in mermaid lagoon. The seeing stars stencil I added on top again in mermaid lagoon oxide ink and as it was a second layer, it looks darker - a tip I got from a blog post of Lisa's.
The die is so bold and eye catching, it didn't need anything else on it other than the word birthday. Such a useful and quick and easy set - another card for my stash! Stick around for more sneak peeks this week and definitely release day on 11th. There's a fab blog hop and an amazing prize! Happy crafting everyone!
I am absolutely delighted to be guest designing for Uniko who have a new feature called Stencil Sunday. I love Uniko and I especially love their stencils - great price, great quality. Bev very kindly sent me a few stencils to add to my collection and I'm using the Natures Treasures II set with these beautiful leaves. You also get the negative and the positive which means even more options, but here I'm just using the negative.
All I did was take a blank white card base, and very carefully holding my stencil in place, blended some distress ink through the stencil. It's easier if you use a sweeping motion almost as if it's a blending brush. I didn't even tape it down with masking tape as no matter what I do, I end up tearing the card. I did one in each corner of one colour, and the other in the other corner in another - Mowed Lawn and Evergreen Bough.
Then all I did after that was stamp the sentiment in Versafine Onyx Black and Distress Oxide Lucky Clover. Done! With not getting much time for card making in between
running a business, stencils can make beautiful and simple cards so
easily. Indeed a friend recently said to me how much she loves my latest
cards because they are so simple!
Thank you for having me Bev and thank you all for reading. I will be back this month with more Uniko goodies - release week is coming up and I shall be joining in. So excited to share! It's really got my mojo going again. Happy Crafting Everyone!
Why hello! So, now that my birthday is over, I'm going into Christmas organising full tilt. How I'm doing is debatable, but the will is there! I wanted to get at least 30 Christmas cards made and today I finished up another four to finally get there. I then decided to write my list for handmade cards and realised I needed 40..... so another 10 will have to be found from somewhere soon!
Anyway, here are the four I made today from Clearly Besotted Stamps supplies. Some very simple Copic colouring on the owls and moose before I fussy cut them. Then I masked of a central piece in on the card blank and lightly dusted different light Altenew inks onto them through one of the new Clearly Besotted stencils. This one is birch background and the inks are very light through them, and the photo doesn't do it justince. I then just glued on the moose and owls.
I then found an old set called Sweet Little Sentiments, which at one point I was going to sell and I'm glad I didn't. The Merry Christmas fited just nicely and I inked it up with some VersaFine Onyx Black as it give such a clean impression first time round.
That, as they say is that!
I did my first ever Christmas Fair last weekend. Just a little one in the school. Oh my was I nervous, but I've had so much support from all my friends and family, it really kept me going. I had a couple of 'too expensive' mutters, but apart from that it was very positive - and exhausting. If you want to find out what I've been up to with my sewing, you can follow my adventures on Instagram and Facebook, as well as my Etsy shop itself.
So I'll be back before Christmas I hope with some more cards now that I have to make those extra 10! Thanks so much for stopping by, Happy Crafting Everyone :)
I've been MICA (Missing In Crafty Action) for a few weeks as I've been working on finishing off stock for my Etsy shop and adding listings. Nobody should ever think Etsy is just take a photo, stick it in your shop and it will sell. You have to know what you are doing and I am very grateful to have the help of Jewellery and Gems with it. Getting my head around all that is needed to get noticed and to get sales on top of looking after the girls and the household just about finished me off last week! Onwards and upwards! It's nice to be able to switch crafts from time to time, so I had a good play with some Copic refills, acetate, card and some large stamps trying out the Alcohol Ink Lift Technique I've seen in passing - Teresa Morgan's video is very good. I know Ranger and Tim Holtz have come out with an alcohol ink lift stamp pad, but these days all my money goes on fabric, so I decided to try it with my Copic refills and some colourless blender as well as the copic cleaner.
I have a video of how I got on. Of course, during the process, my video camera died, so I had to scrabble around for the charger and the best results I had have been lost, but I hope you still find the other footage useful. Please remember that YouTube is a third party and as such you may want to look at its privacy policy if you have any concerns about cookies being placed on your machine.
What I've learnt is: Colourless Blender is best - the cleaner pushes the ink away too much A detailed stamps works better than a semi solid stamp Acetate works quite well, but it can take a while to dry, and it does leave it a bit sticky Don't put foil flakes on...... see video as to why! Don't put too much colourless blender on your sponge when using with stencils Have fun making a mess - I know Michelle Short uses gloves and now I know why!!
When it works it works really really nicely and I have three finished projects as you can see. I even made a shaker having seen Lisa's recent fantastic efforts. It's been a while!
Have you ever tried this?? It was a really great session! I've seen people using gelli plates with alcohol ink too, so maybe that's also something to try. Happy crafting everyone!