Hello again, Crafty Friends. You'd be forgiven for thinking that nothing was going on craft wise for me based on this blog, but you'd be wrong! I've actually been doing quite a bit, but can't share the cards I've made until I know they've gone to their intended recipients. I like things to be a surprise!
Instead I've been making the most of some of the freebies I receive as part of my subscription to Simply Cards and Papercraft. This month it was a build-a-flower die, but I've not had any inspiration to use it yet, despite all the cards inside. They highlighted, however, that Papercraft Essentials (it's sister magazine), issue 124 had a great looking Christmas die and stamp set. I swithered about it, but I knew I wanted it, and when I saw that Liz McGuire of Buttons For Brains was doing the inspiration cards, I had to get it. So I did. And it's great.
I felt like pairing it up with my other great favourite, the Mini Milk Cartons from SCP issue 136. I think it works a treat.
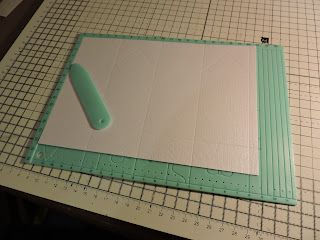
I actually made two of them, the second being more successful than the first, so I'll tell you how I did the second! I cut my Bazzill Bling cardstock to size and scored it on the board, as per the instructions in the magazine.
I then die cut out my Merry Christmas and holly onto green cardstock, putting some Stick It on the back. I decided second time round it was easier to put the die cuts onto the carton before making it up, as I do with the sticky tape.
I then carefully stuck the cartons together. I say carefully because that tape is lethal if you get it wrong and tears the card badly if you have to remove it - it usually ruins it. But if you get it right, it sticks like super glue!
You can get two cartons out of one 12x12 piece of cardstock, but as you can see, on the second, the bottom piece is shorter. It didn't seem to matter too much, and I think the second actually looks neater.
I then stamped the robin onto some Neenah 110lb cardstock (it arrived this week from Simon Says Stamp!) in Memento Tuxedo Black and coloured him with Copics, and carefully cut a circle out around him - I drew around a circle die cut as a template to make things easier.
I attached him to the top with twine, and added a mini peg for good measure. As I've mentioned before, you can get 4 Lindor in each one - they make a nice little gift.
Here are a few more arty shots - I'm getting used to my new camera. And just in case you are wondering why the holly berries are green, I'd like to say it was artistic licence, but sadly, it's just that I discovered that I don't have any red card stock at the moment - I shall rectify that soon!
[Supplies: Free die and stamp set from Papercraft Essentials issue 124; Scoreboard from SCP 136; Bazzill 12x12 cardstock; Super Sticky Red tape; Scissors; Manual Die Cutting Machine - mine is a Grand Calibur; Papermania Capsule 6x6 Solid Smooth Texture 75 sheets and coloured cardstock; Stick It; Neenah Solar White 110lb cardstock; Memento Tuxedo Black; Red Baker's Twine (free with a magazine!); Copic Markers; Mini pegs - I actually got mine in Sainsburys, but they aren't listed online]
Thank you so much for reading. I really do cherish all your comments. Have a great weekend :)
P.S. Don't forget that there's a new Clearly Besotted release this Saturday (5th September, 10pm GMT). I know what I'm getting ;)


8 comments:
These are so sweet!
Love these little cartons Ruth, so cute! I struggled with that die, getting the image out without it tearing. Time to find the waxed paper I think xx
Oh, my, these are just the cutest little cartons, Ruth!! Those die-makers are beyond clever, aren't they? (And they keep separating me from my money, haha!) Hugs, Darnell
I've made these once they r so cute!
Those are fabulous Ruth! I love the little milk cartons :)
Dawn x
These are simply stunning sweetie perfect in every way, hugs Pops x
Ruth, love these milk cartons . Your photos and instructions are brilliant. Cant wait to see more.
These are so neat, Ruth! So neat! Love them. I know the fatal tapes you talked about. So good if on a right place.. if not... another story to be told. Can't wait to see your cards that you hiding too.. :)
Post a Comment